


Are you looking for a way to grow healthy food at home?
- How about quickly, like 7 days time.
- What if the plant was super nutritious?!
- Plus you don’t have to touch any dirt.
There’s so many reasons why growing Sprouts at home is an exceptional idea.
- Do this with the kids
- Save money by growing your own $$
We’ll show you our own 1 week batch from seeds to sprouts and explain the easy steps below.
_________
Here’s what you’ll need:

- A Mason Jar
- A special Mason Jar Lid or cover for the top
- A Package of Sprout Seeds
- Filtered Water
Let’s start with those special mason jar lids.
I prefer the premade screen tops here for ease.
2 lids, $9 Amazon.com: Sprouting Lids

However, you can also make your own at home with some mesh wire and a rubber band, zip-tie or metal circular clamp.
Then the seed mix.
If we’re going for the healthiest option…the Antioxidant Mix from Food to Live is my top choice.
- It’s organic
- Made of Broccoli, Clover and Alfalfa seeds
- This $21 bag has lasted me 1 year Sprout Seed Mix
Otherwise there are lots of great options available.
_________
Ok our process, day-by-day.
Day 1:
- Put 1 tablespoon of seed mix into the mason jar.
- Put the lid on.
- Pour filtered water about halfway full.
- Place the jar in a cool, dark location for the next 12 - 16 hrs.


Day 2:
- Dump the water and flush once with filtered water.
- Empty all water out of the jar.
- Roll the jar around a bit, sticking seeds to its side.
- Replace jar in cool, dark location for 24 hrs.
 *There’s first bits of germination happening!
Day 3:
- Repeat day 2
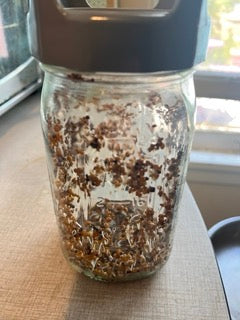 *The growth continues.
Day 4:
- Repeat day 2
- However, seeds will not stick as well now. That’s ok!
- Keep the jar lid-side facing down now.
- Now store in a cool area but with a little more sunlight exposure.
*Green arrives!


Day 5:
- Flush and reset in cool, brighter area.
- It’s worth noting in warmer times of the year, sprouts can be done growing in 5 days time.
- During colder parts of the year, it may be 7 - 8 days before sprouts are ready for harvesting.
- Continue to repeat day 4 until sprouts appear full grown.
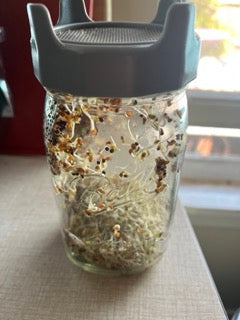

*Our Sprouts are here!
Now it’s time to harvest and refrigerate them!
- Get a strainer and put your sprouts in and wash away remaining unsprouted seeds. (It’s common to have a bunch left… this is just extra health.)
- EAT SOME FRESH SPROUTS ALREADY!
- Then grab a tupperware container and add a single paper towel sheet to the bottom.
- Place sprouts on top of the paper towel and refrigerate.


Sprouts are best eaten raw, nutritionally speaking. They are a great addition to salads and sandwiches.
*IMPORTANT NOTE*: Sprouts can go bad quick.
They start to smell bad when they do plus get real soft and mushy.
Throw them out when they’ve gone bad.
This 9 min video on Youtube has an easy step-by-step to refer back to:
HOW TO SPROUT SEEDS | EASY GUIDE | Foolproof Method
Add Sprout Growing At Home Today!➕💙